Made by Pe Themes
First of all, Thank you so much for purchasing this template and for being our customer. You are awesome!
You are entitled to get free lifetime updates to this product + exceptional support from the author directly.
This documentation is to help you regarding each step of customization.
Please go through the documentation carefully to understand how this template is made and how to edit this properly.
When you purchase Alioth from Themeforest, you need to login your account and download theme files from Themeforest. Please make sure you downloaded All file & Documentation option.
After you downloaded theme files you will find inside it;
01. Demo Content - Contains exported .xml files
02. Documentation - Contains Alioth theme documentation
03. alioth.zip - Theme file for WordPress installation, if you want to install your theme manually (with FTP) you must unzip this file.
04. alioth-child.zip - Child Theme file for WordPress installation, if you want to install your theme manually (with FTP) you must unzip this file.
There's two way for install themes on WordPress, you can select which one is good for you.
Theme Installation via WordPress Admin;
Step 1: Login your WordPress admin dashboard
Step 2: Navigate to Appearance > Themes
Step 3: Click on Upload Theme
Step 4: Click on chose file, select "alioth.zip" and click Install Now.
Step 5: After upload is finished, click on Alioth to Activate
Theme Installation Manual (via FTP);
Step 1: Login to your hosting server via FTP client.
Step 2: Go to the folder /wp-content/themes
Step 3: Upload "alioth.zip" extracted content
Step 4: Login your WordPress admin dashboard Upload Theme
Step 5: Navigate to Appearance > Themes
Step 6: Click on Alioth to Activate
After you install and activate Alioth, you need to setup some couple of things to use it best condition. Please follow these documentation.
Every theme needs some plug-ins and with Alioth, you can install necessary plugins with only one click. Please follow these steps below;
Step 1: After you activate Alioth, you will see a sub-menu named "İnstall Plugins" inside of Appearance menu.
Step 2: Click on İnstall Plugins
Step 3: Install and activate all plug-ins
Alioth demo content can be install with two ways;
If you want to install demo content automatically with one click demo importer which is strongly recommended by us, please follow these steps below;
Step 1: After you activate the theme and install plugins, there'll be a submenu ("Import Demo Data") appears below "Appearance" menu on WordPress Admin Dashboard click on it.
Step 2: Select which demo you want to install and click "import" button below it.
Step 3: Just wait a couple of minutes and everything will be done.
After the installation is done all pages, portfolios. posts will be imported correctly, menus and pages will be setted.
If you want to install demo content manualy please follow these steps below;
After you download theme files you will see a folder named "Demo Content", this folder contains an .xml file "alioth.xml" , to install demo content follow these steps:
Step 1: Navigate Tools > Import in your WordPress admin dashboard.
Step 2: Click on WordPress > Install Now
Step 3: After plugin installation complete click on Run Importer
Step 4: Click on Choose File and choose .xml file you want to import.
Step 5: Click on Choose File and choose alioth.xml file.
Step 6: Click on Upload file and import.
IMPORTANT NOTICE: Images and videos in demo website are not included with your purchase from ThemeForest, there are just for demo website. So after you install demo content images and videos will not be there.
After you install .xml file you still need to do some couple of things please continue follow these guide.
If you install demo content with one click demo import method this setting will be done automatically.
After you install ml you need to setup navigation menu. Follow these very easy steps below:
Step 1: Navigate Appearance > Menus in your WordPress admin dashboard
Step 2: You will see a menu named Main Menu created
Step 3: Scroll to bottom of the page
Step 4: Click Primary Menu checkbox
Step 5: Click on Save Menu
If you install demo content with one click demo import method this setting will be done automatically.
After you install demo .xml you need to setup home page. Follow these very easy steps below:
Step 1: Navigate Settings > Reading in your WordPress admin dashboard
Step 2: There is two variation for homepage display.
Step 3: Click on A static page(select below) checkbox, and select an home page.
Step 4: Select Blog in Posts page select menu.
Step 5: Click on Save Changes.
After you activate theme and install plugins there'll be a new menu item appears ("Alioth Options") on WordPress Admin Dashboard.
You can find all theme settings here let's take a look whats in it;
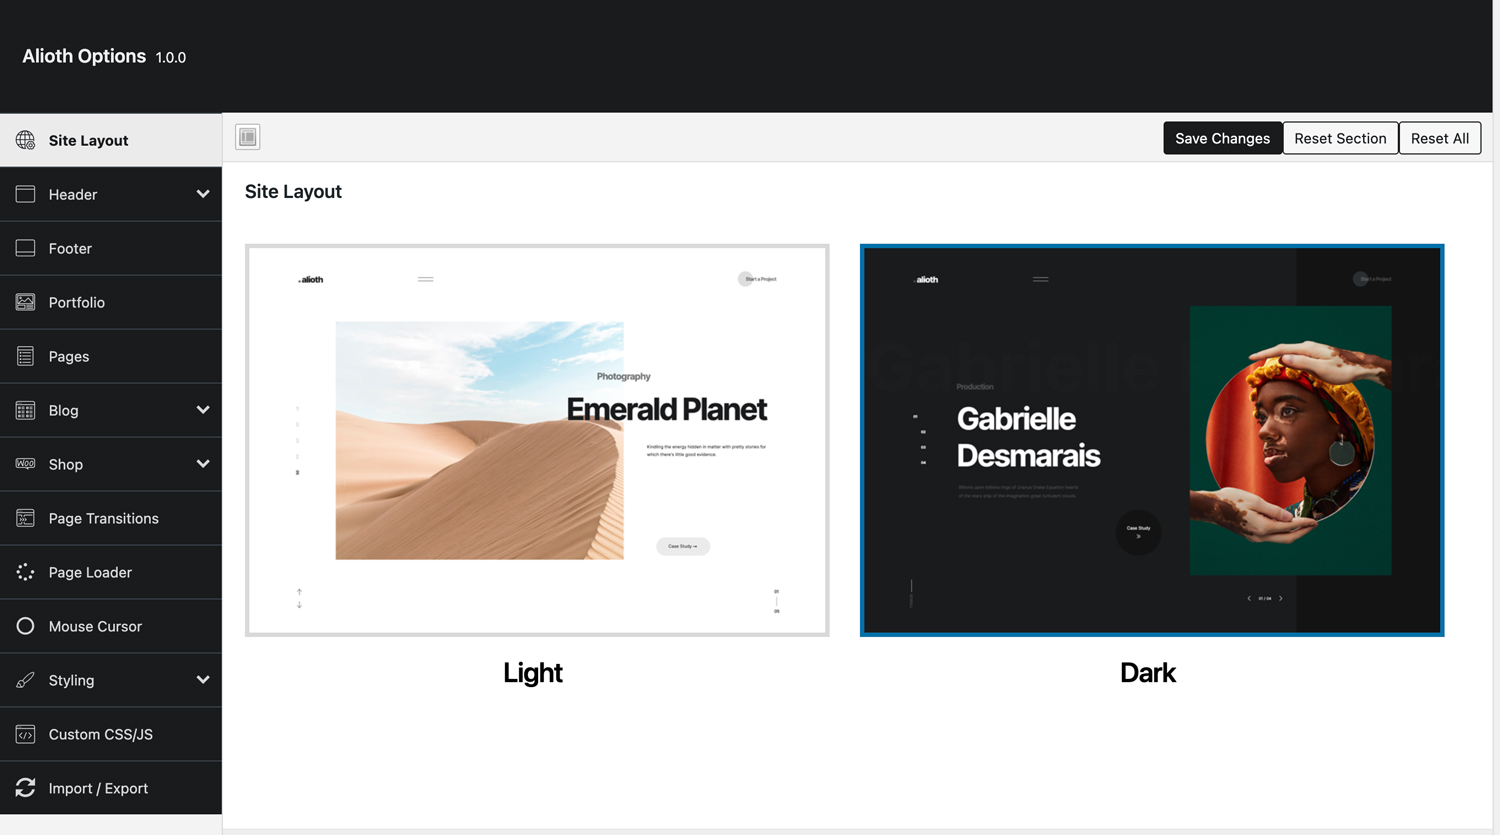
This option allow you to choose site layout with only one click. When you select site layout from here all theme styles willl be setted automaticly based your selection.
There's three sub settings tab below this tab;

You can set general header settings in this tab.
Header Layout: Selection between header dark and light layouts.
Header Height: This setting will be used when header in static position
Logo Size: Custom logo dimensions.
Header Type: Select between static and sticky header.
Animate Sticky Header: Swtich no if you don't want to animate sticky header.
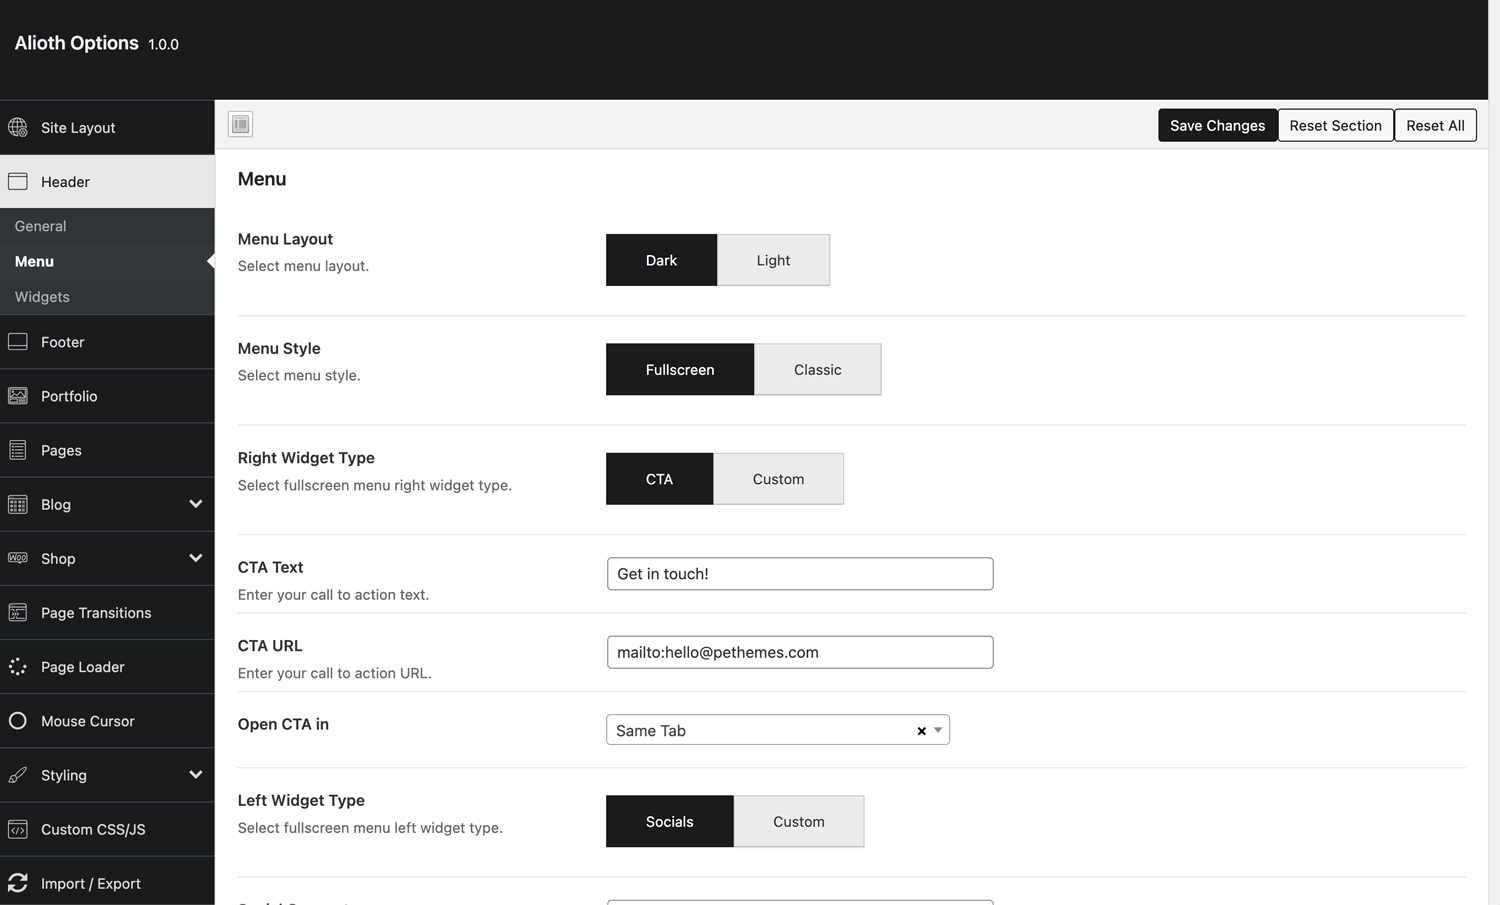
You can set menu settings in this tab.
Menu Layout: Selection between menu dark and light layouts.
Menu Style: Menu style selection.
Right Widget Type: Select "Custom" if you don't want to use default theme widget.
CTA Text: Default theme widget text.
CTA Url:Default theme widget URL.
Open CTA in:Default theme widget URL target.
Left Widget Type:Select "Custom" if you don't want to use default theme widget.
Social Conects:Add your social connections here.
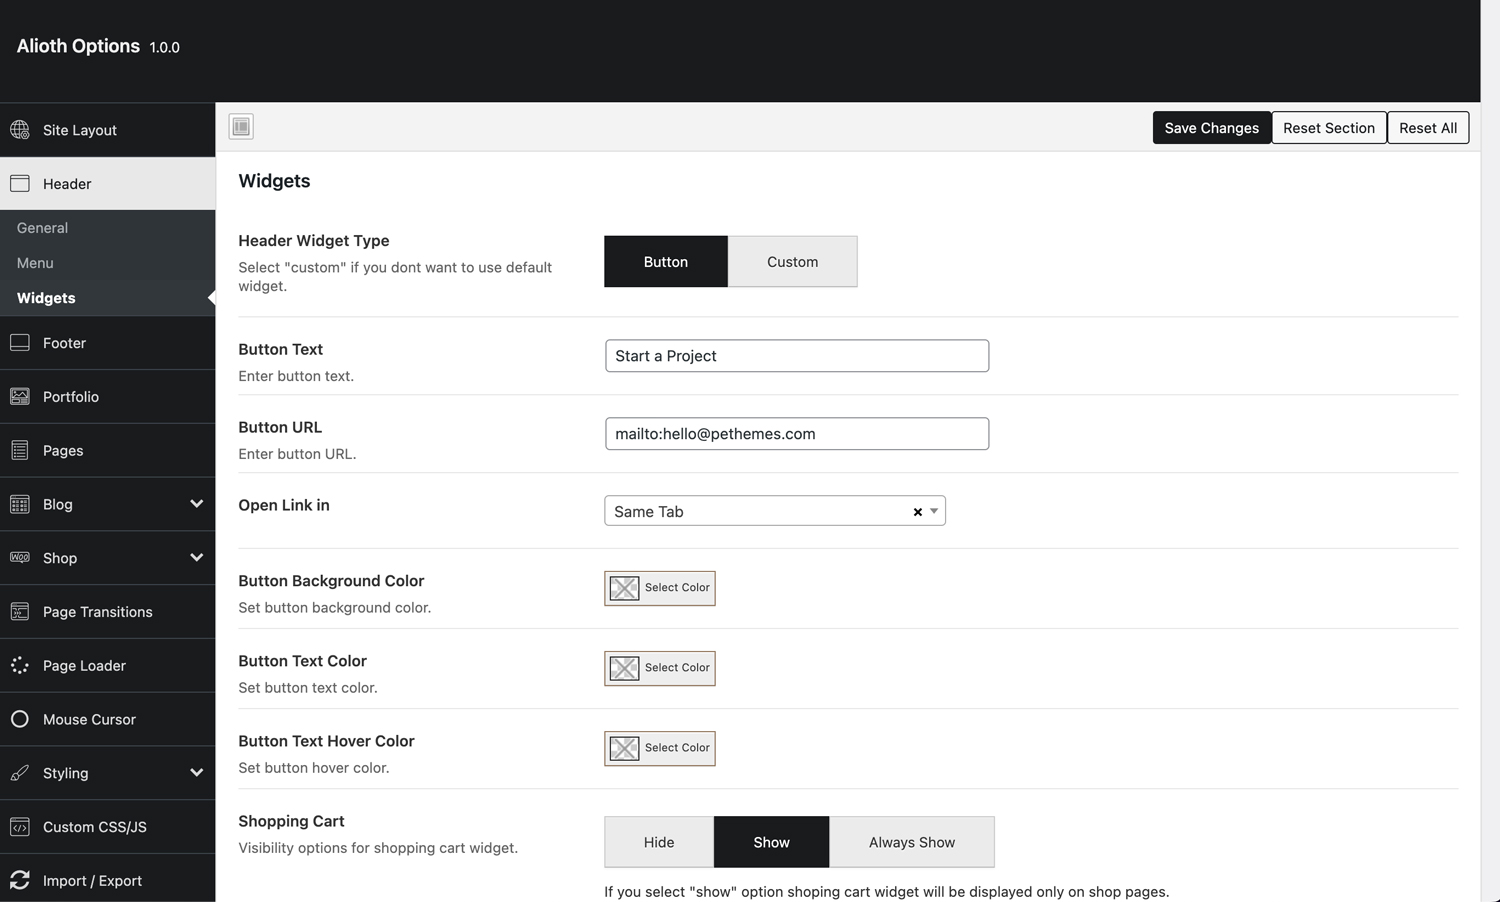
You can set header header widget settings in this tab.
Header Widget Type: Select "Custom" if you dont watn to use default header widget
Button Text: Default widget text
Button URL: Default widget URL
Open link in: Default widget link target.
Button Background Color: Default widget background color.
Button Text Color: Default widget text color
Button Text Hover Color: Default widget text hover color.
Shopping Cart: Shopping cart icon visibility options.
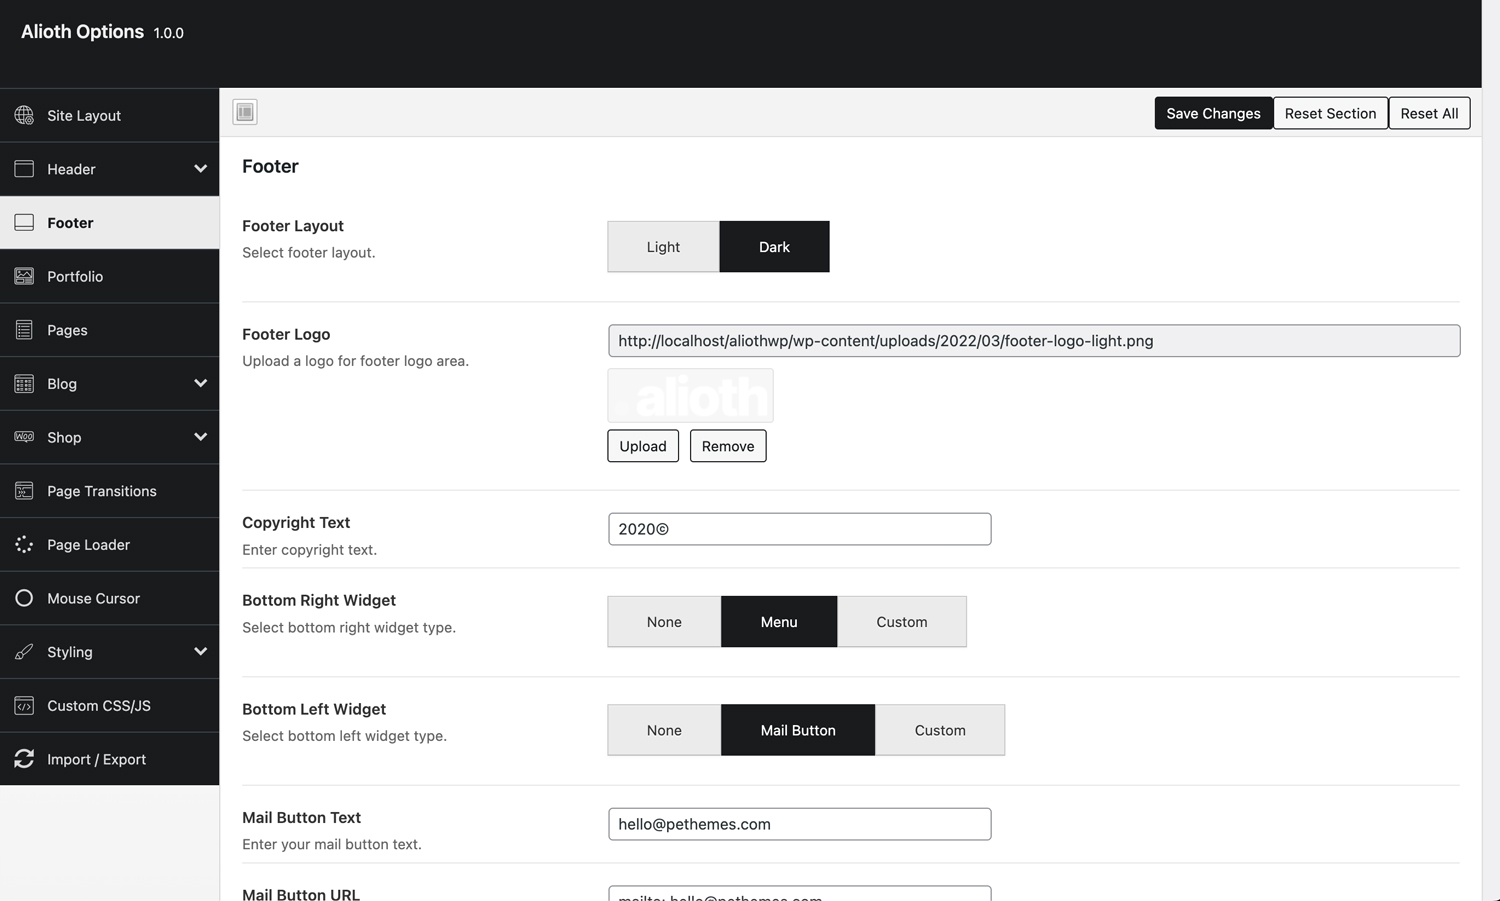
You can setup footer setting here
Footer Layout: Selection between dark and light footer layouts.
Footer Logo: Upload your logo for displaying on footer
Copyright Text: Copyright text area.
Bottom Right Widget: Bottom right widget visibility options.
Bottom Left Widget: Bottom left widget visibility options.
Mail Button Text: Will be used as display text if you select "Mail Button" for "Bottom Left Widget"
Mail Button URL: Will be used as link URL if you select "Mail Button" for "Bottom Left Widget"
Open link in: Will be used as link target if you select "Mail Button" for "Bottom Left Widget"
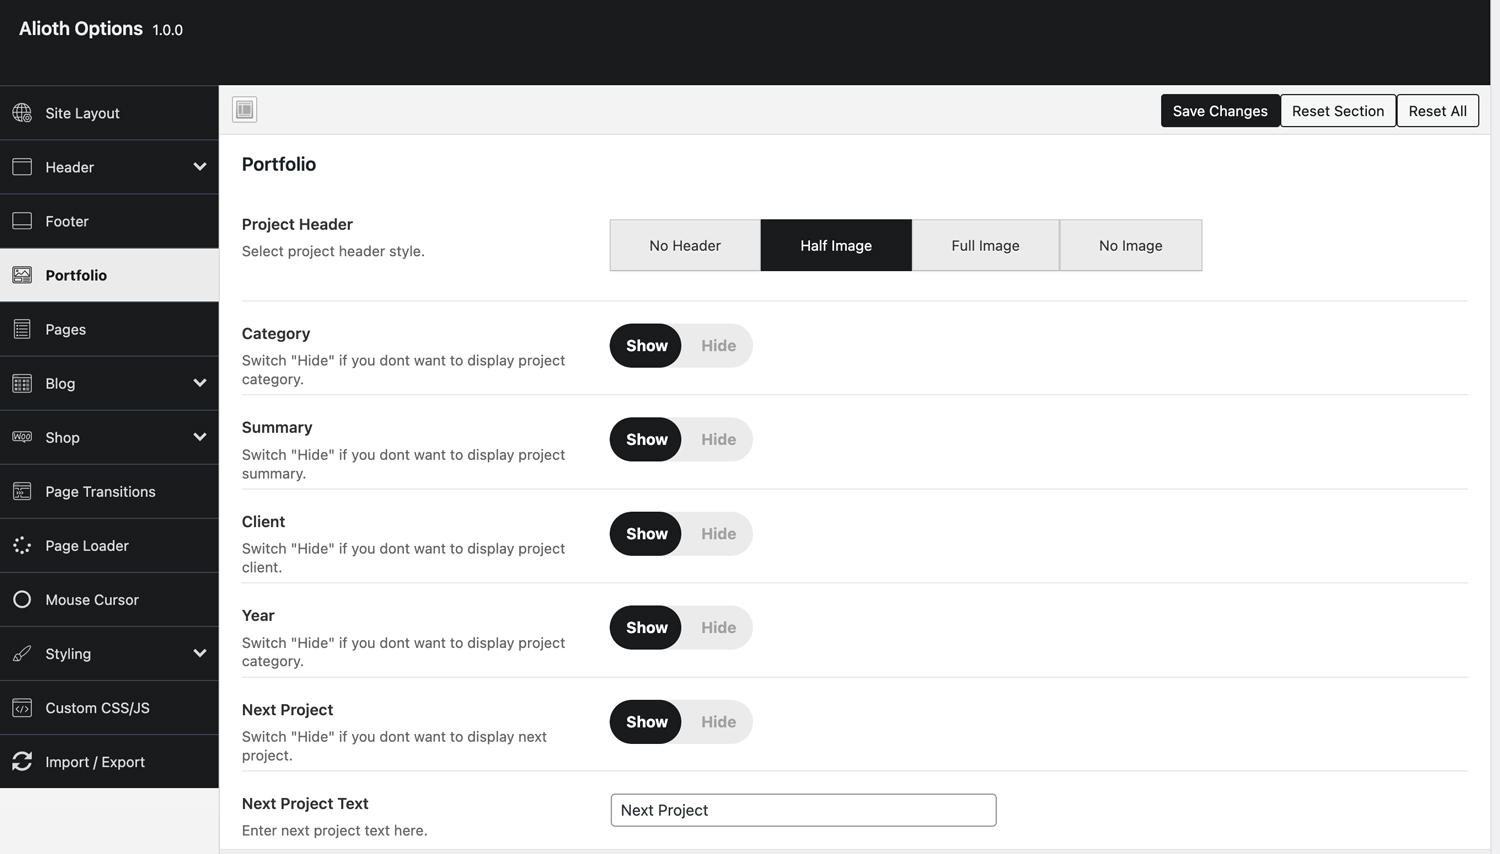
You can setup portfolio general setting here
Project Header: Global project header style selection
Category: Category visibilation option for single project page.
Summary: Summary visibilation option for single project page.
Client: Client visibilation option for single project page.
Year: Year visibilation option for single project page.
Next Project: Next project visibilation option for single project page.
Next Project Title: Next project title text for single project page
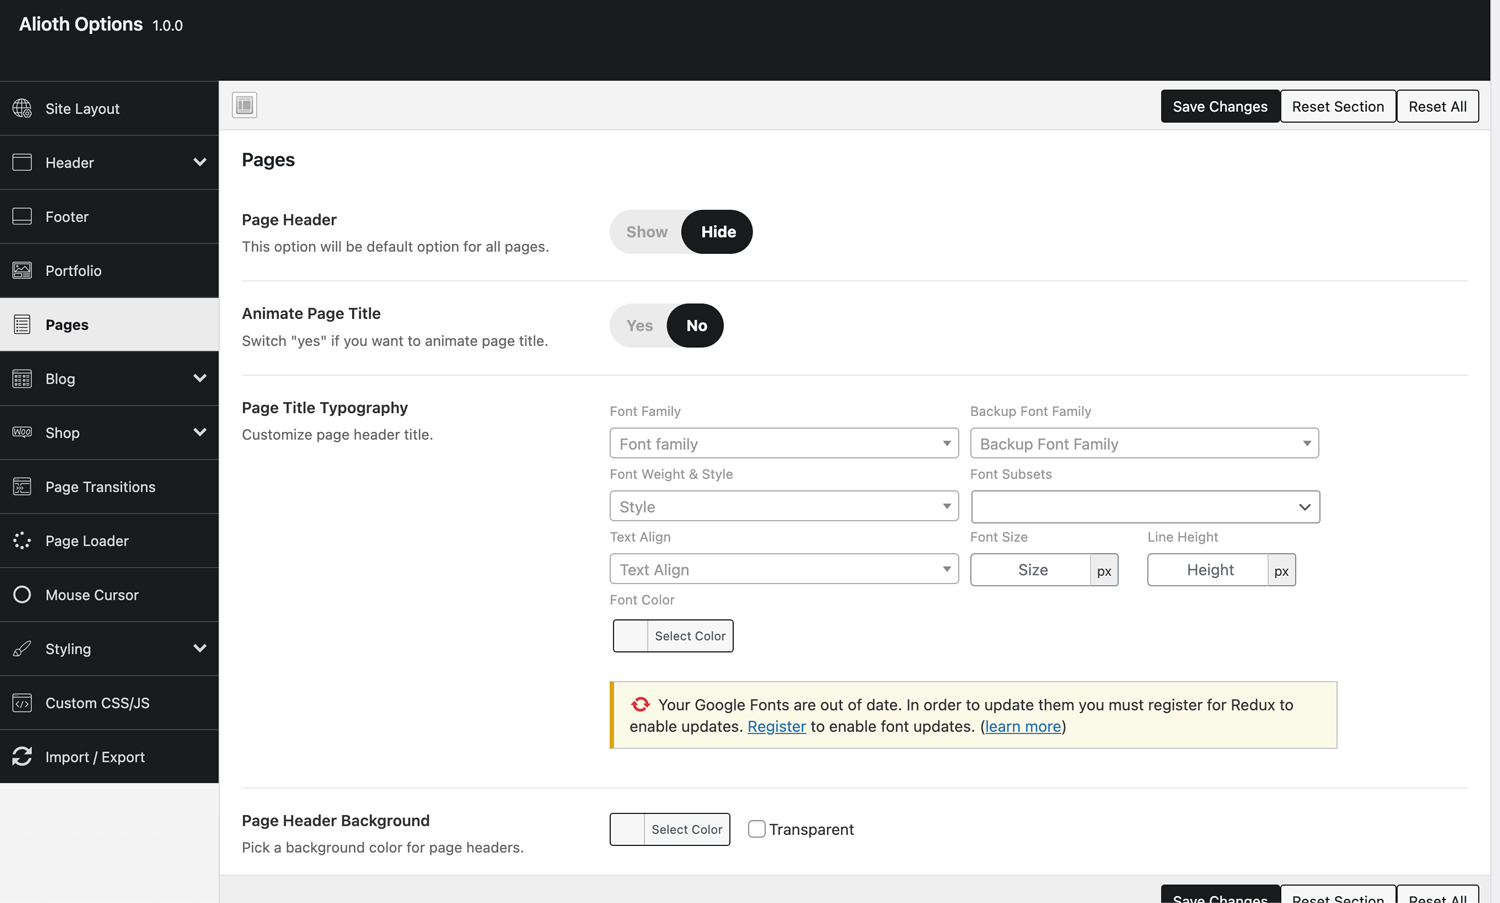
You can setup page general setting here
Page Header: Global page header visibility option.
Animate Page Title: Global page header animation activation.
Page Title Typography: Page title typography options.
Page Header Background: Page header background color option.
There's two sub settings tab below this tab;
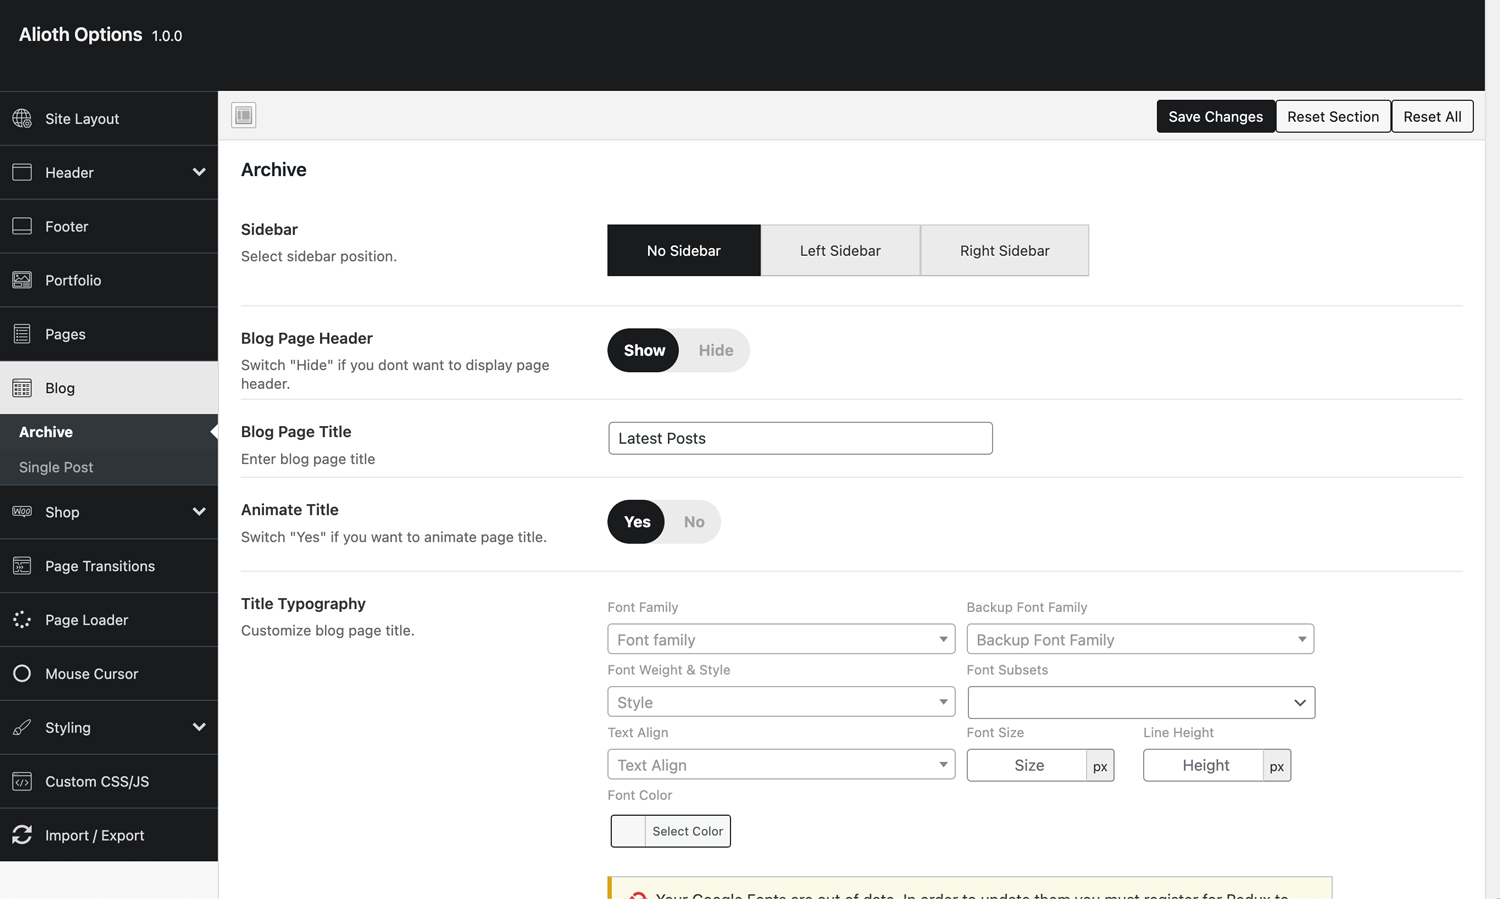
You can set blog archive settings here.
Sidebar: Sidebar visibility option for blog archive.
Blog Page Header: Blog archive page header visibility option.
Blog Page Title: Enter blog page title here.
Animate Title: Blog page header animation activation.
Title Typography: Archive page title typography options.
Heder Background: Header bakcground color selection.
Archive Post Settings: Post display options on arhchive page.
Post Date: Post date visibility option for archive post.
Post Category: Post category visibility option for archive post.
Post Excerpt: Post excerpt visibility option for archive post.
Post Thumbnail: Post thumbnail visibility option for archive post.
Read More Text: Enter read more text for archive post.
There's two sub settings tab below this tab;

You can set single blog post settings here.
Sidebar: Sidebar visibility option for blog archive.
Post Thumbnail: Post thumbnail visibilation for single post page
Post Date: Post date visibilation for single post page
Post Category: Post category visibilation for single post page
Posts Navigation: Posts navigation visibilation for single post page
Next Post Text: Enter next post text here.
There's two sub settings tab below this tab;
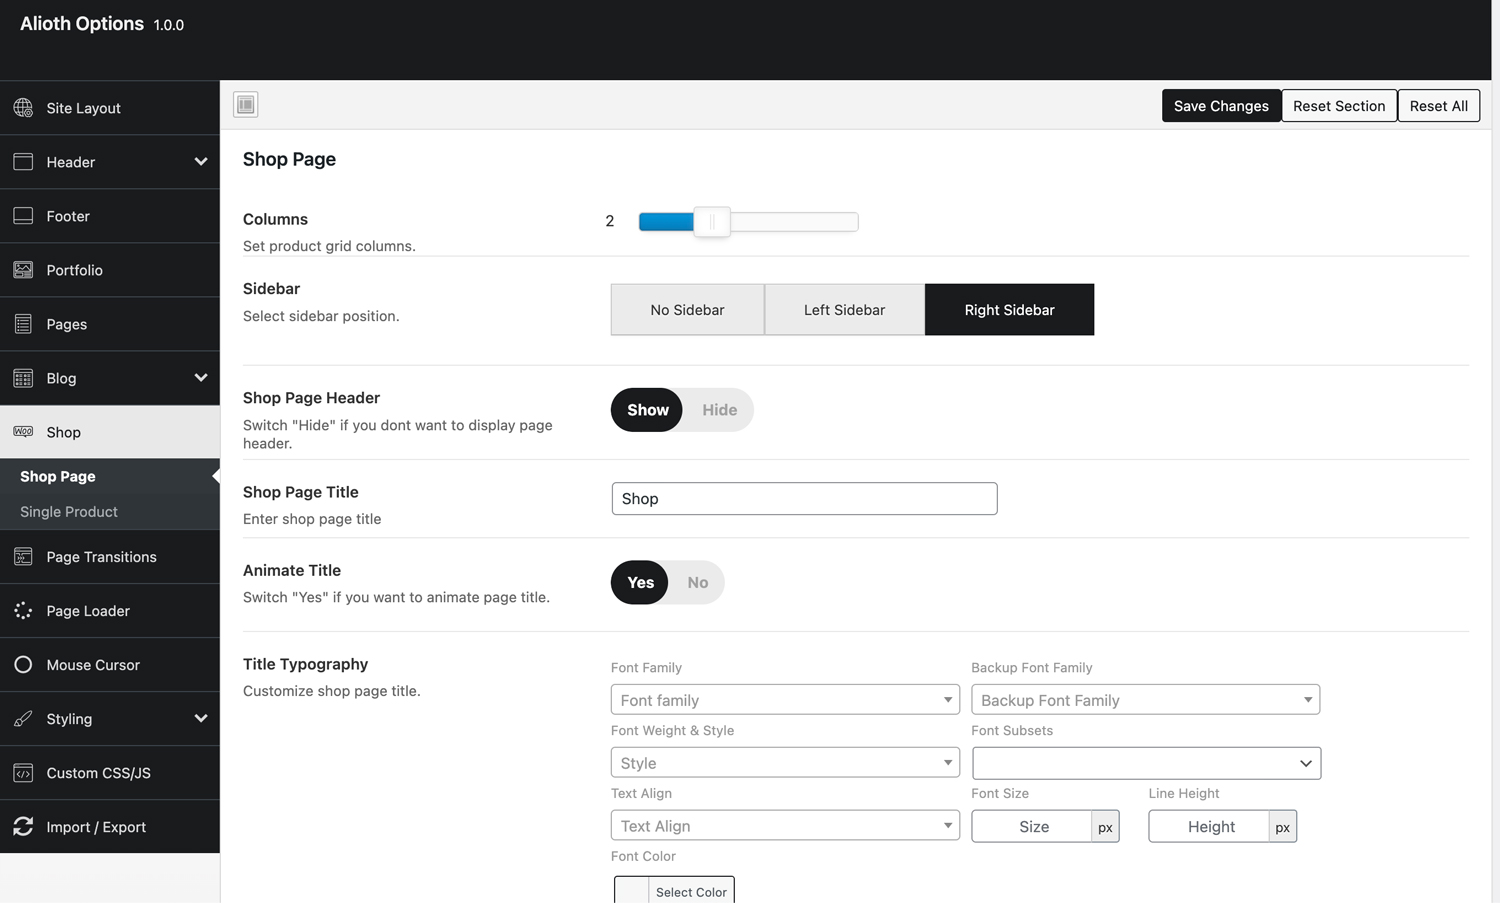
Columns: Shop products grid column size
Sidebar: Sidebar visibilation for shop page
Shop Page Header: Shop page header visibility.
Shop Page Title: Enter shop page title here.
Animate Title: Shop page header animation
Title Typography: Shop page title typography
Header Background: Shop page header background color
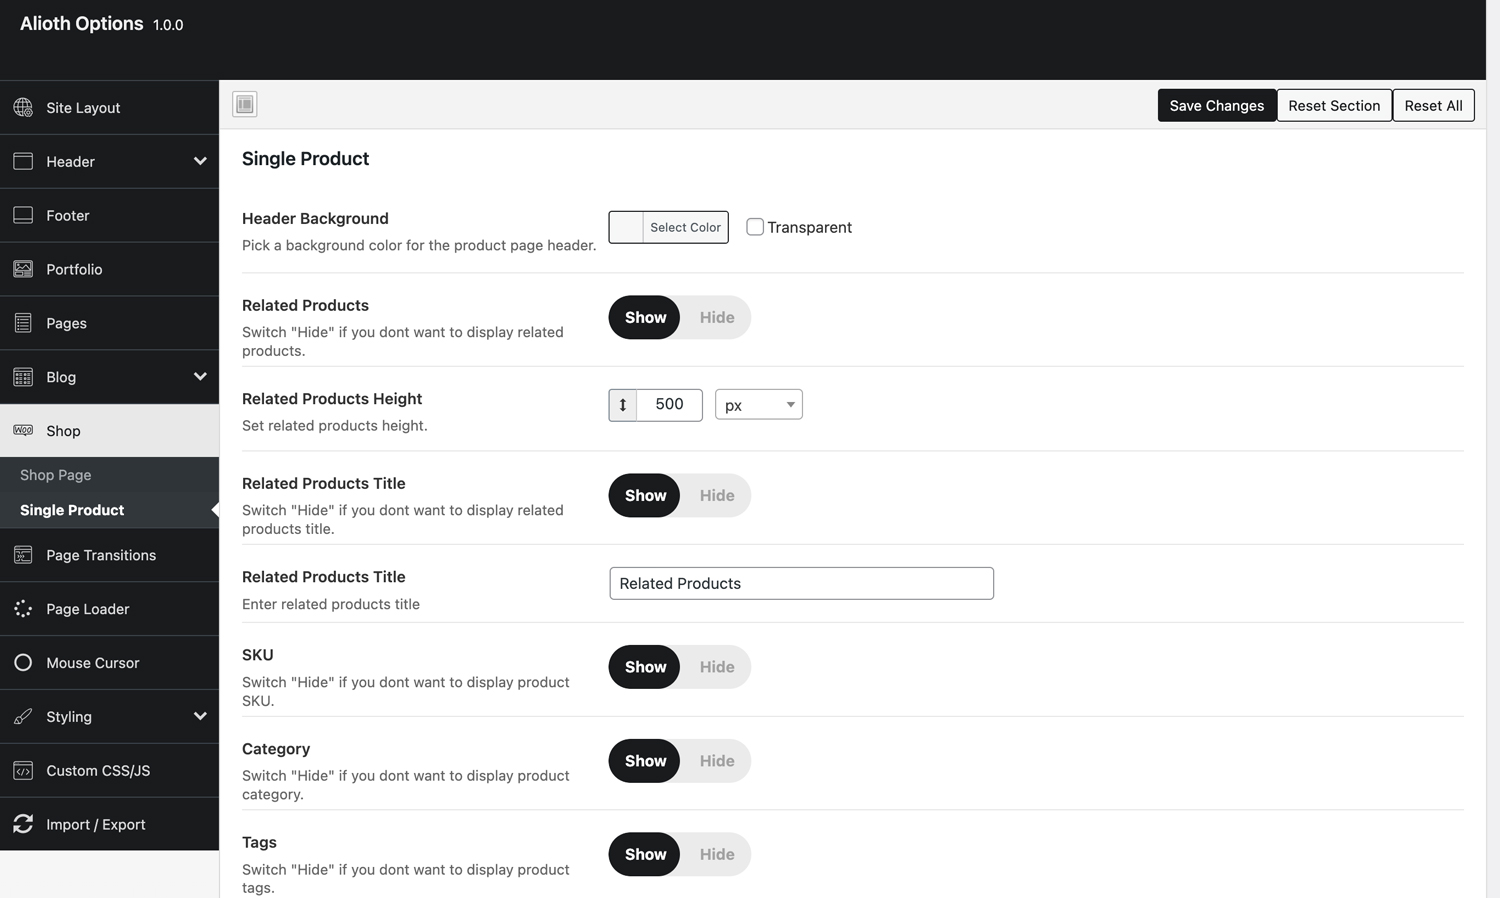
Header Background: Single product header background color.
Related Products: Related products visibility.
Related Products Height: Related product image height
Related Products Title: Related products title visibility option.
Related Products Title: Related products custom title.
SKU: SKU visibility for single product page.
Categroy: Category visibility for single product page.
Tags: Tags visibility for single product page.
Short Description: Short description visibility for single product page.
Slider Arrows: Slider arrows visibility for single product page.
Slide Numbers: Slide numbers visibility for single product page.
Page Transitions: Page transitions activation/deactivation.
Page Transitions Layout: Layout switcher for page transition animation.
Loading Text: Text will used on default page transition animation.
Loading Text Color: Color selection for loading text.
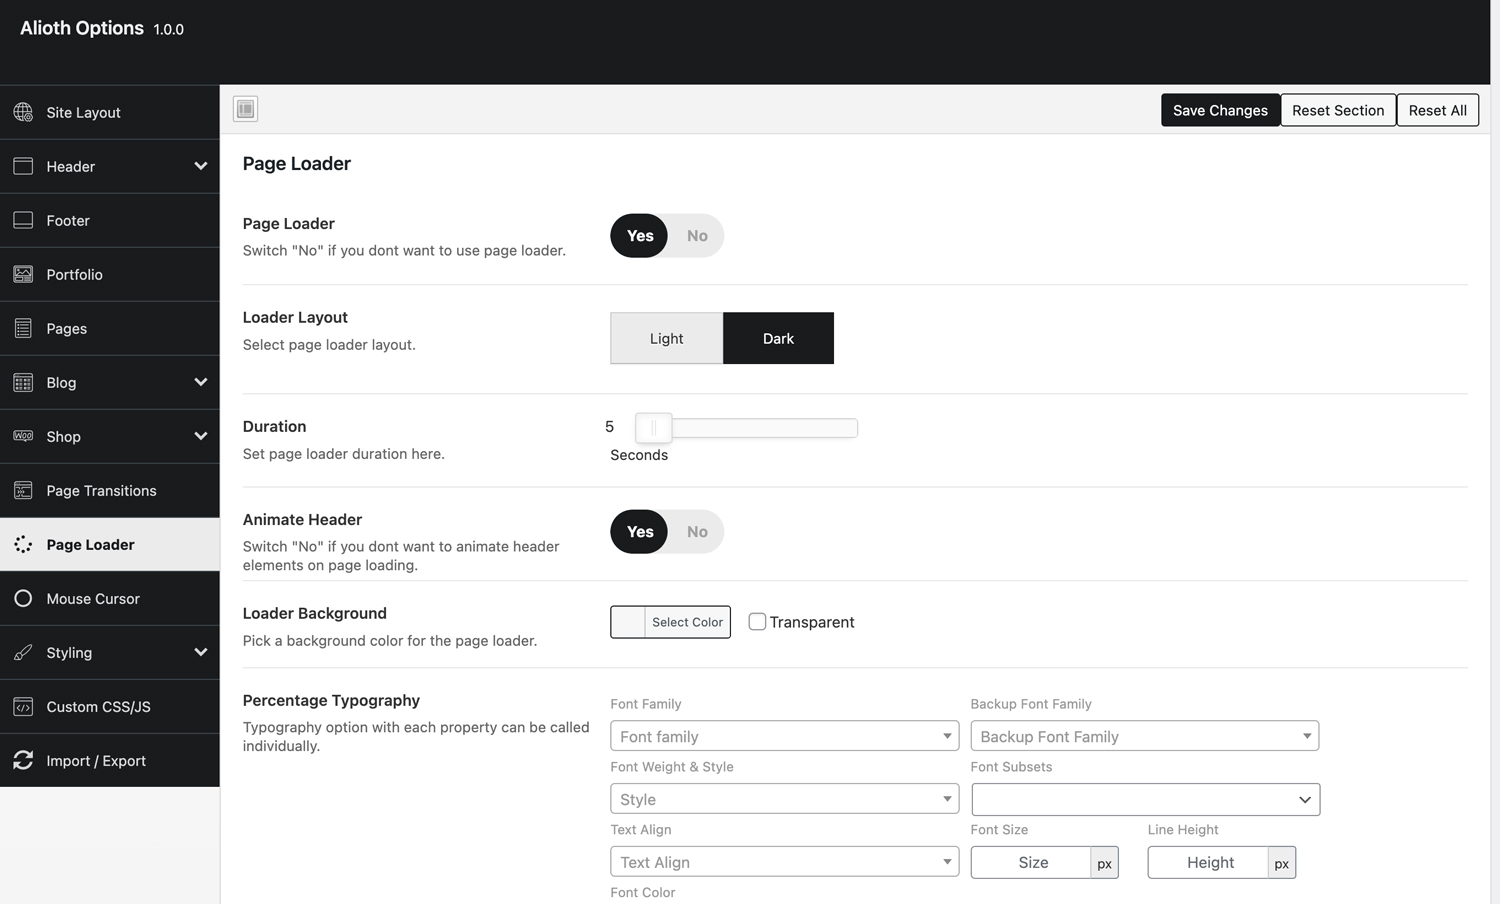
Page Loader: Page loader activation/deactivation.
Loader Layout: Layout switcger for page loader.
Duration: Page loader animation duration.
Animate Header: Site header animate option when page is loading.
Loader Background: Page loader background color selection.
Percentage Typography: Page loader percentage typography option.
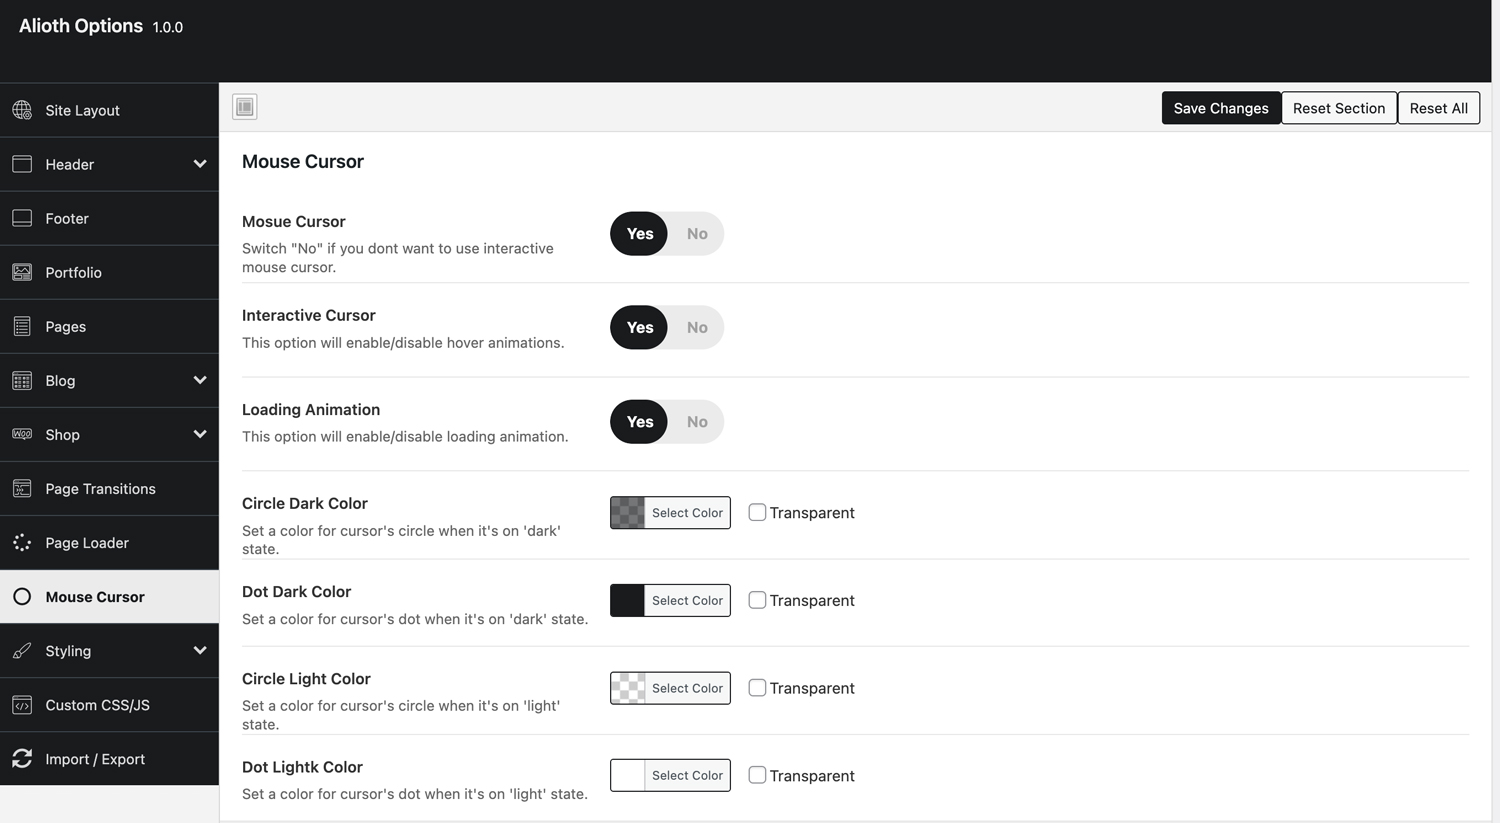
Mouse Cursor: Mouse cursor activation/deactivation.
Interactive Cursor: Mouse cursor interaction effects.
Loading Animation: Animate select when a page is loading
Circle Dark Color: Color selection for cursor circle on dark state.
Dot Dark Color: Color selection for cursor dot on dark state.
Circle Dark Color: Color selection for cursor circle on dark state.
Dot Light Color: Color selection for cursor dot on light state.
Circle Light Color: Color selection for cursor circle on light state.
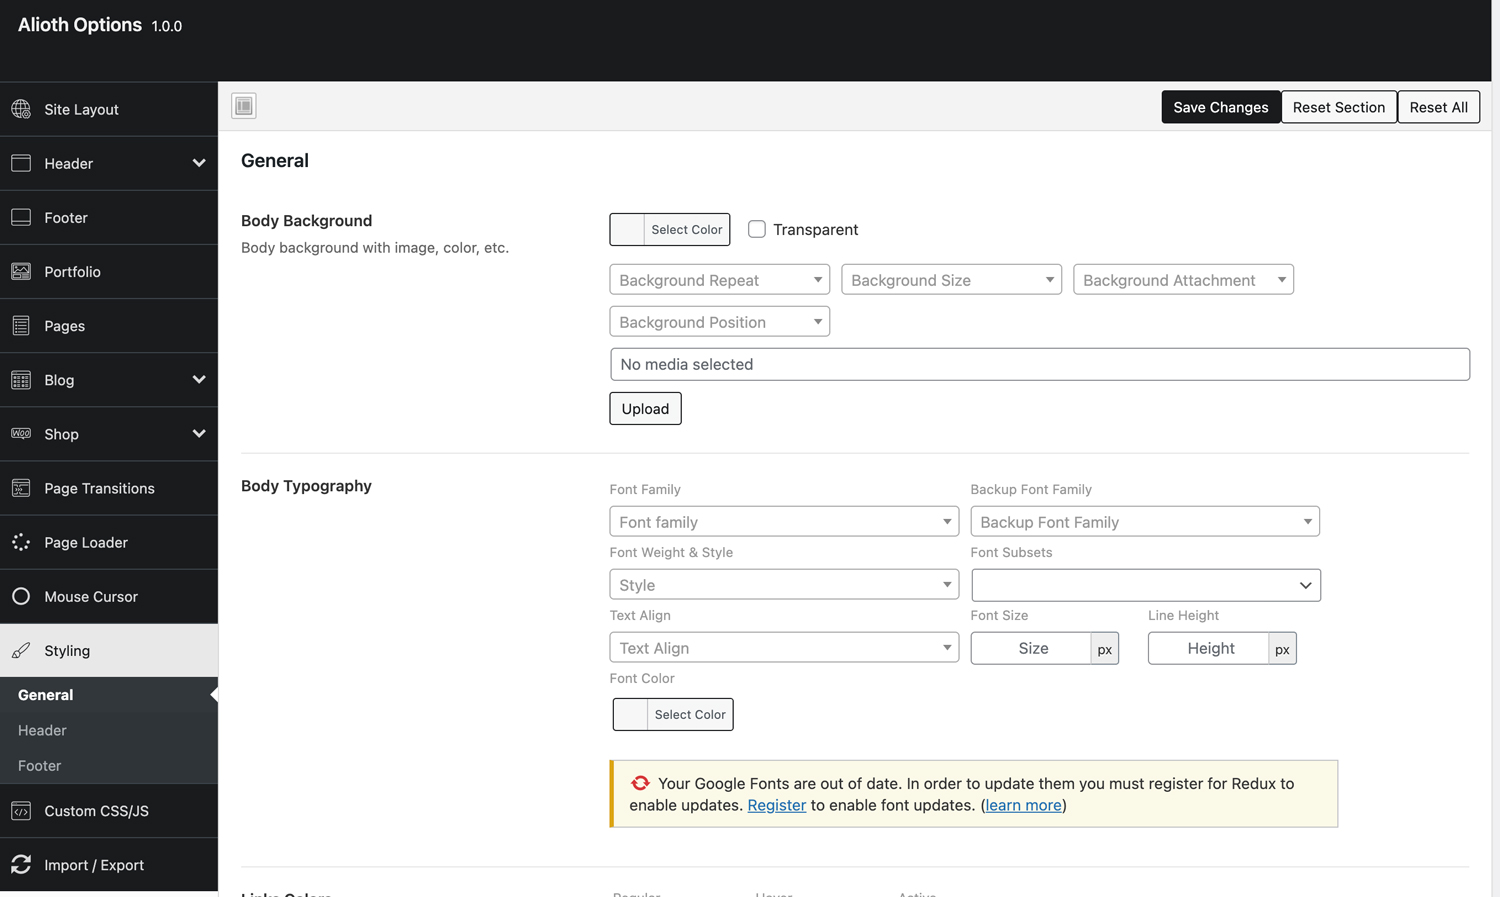
Global styling options.
In Alioth, all portfolio showcase layouts are included in Elementor Page Builder these are just like other page build elements in Elementor.
For create a showcase page please follow these steps below;
Step 1: Navigate "Pages -> Add New" on your WordPress Admin Dashboard.
Step 2: Add a title for this page.
Step 3: Click on "Edit With Elementor" button and start Elementor Page Builder.

Step 4: After Elementor opened, click on new section button.

Step 5: Select 1 column section structure.
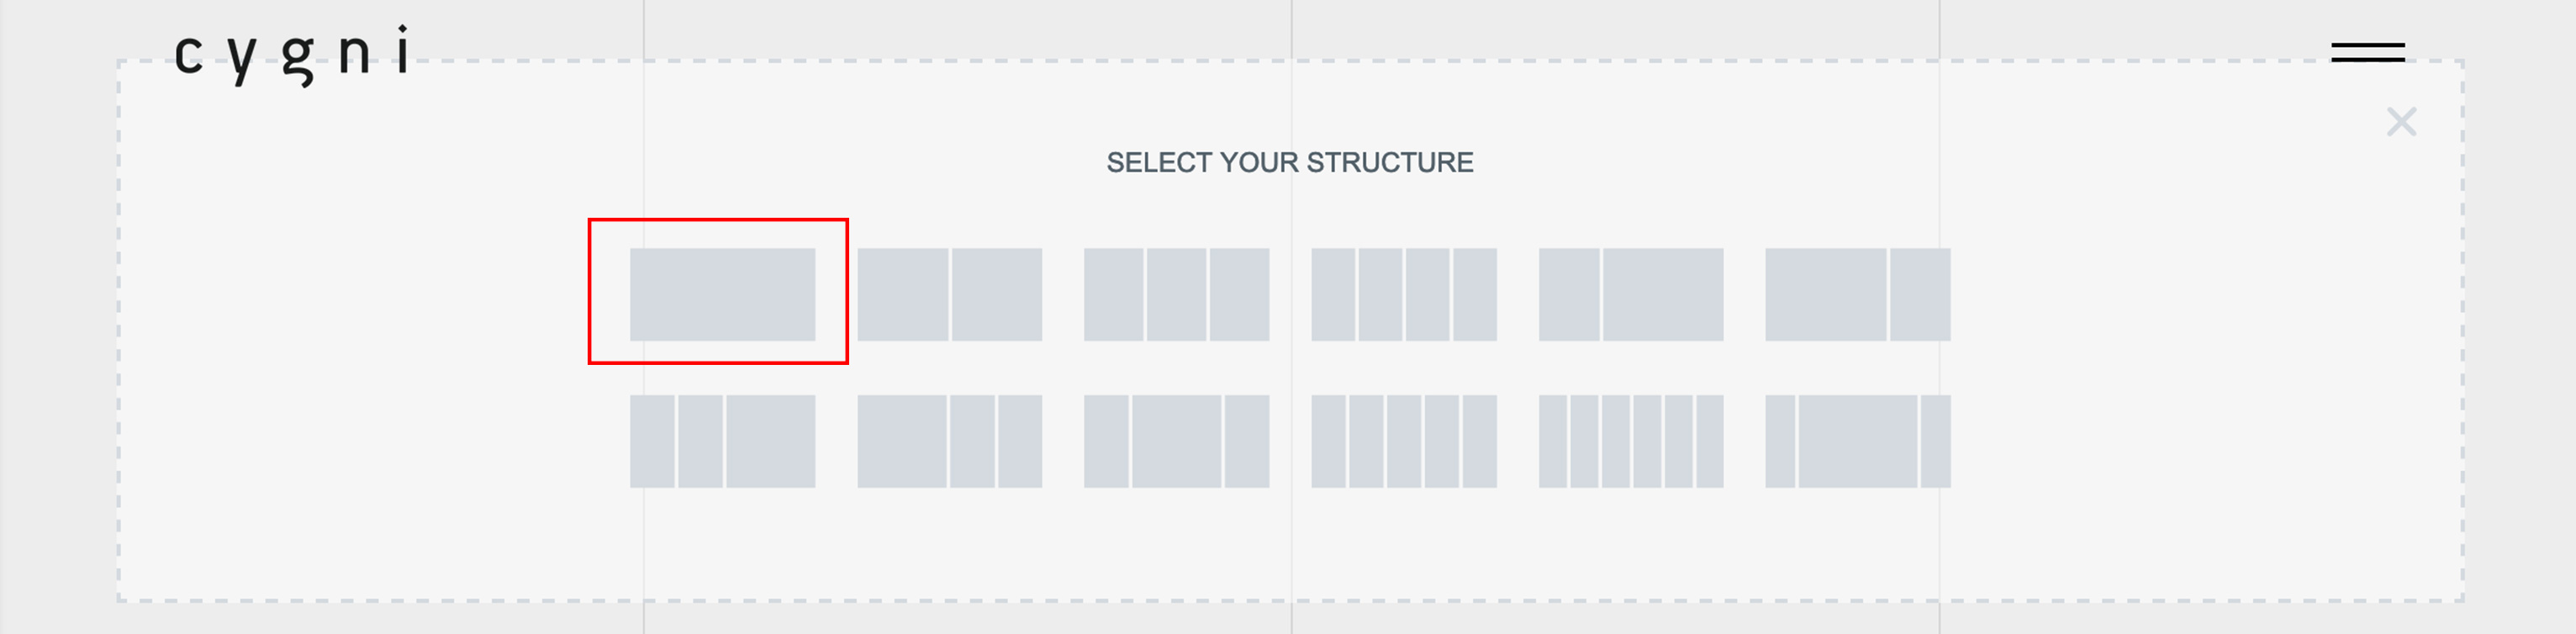
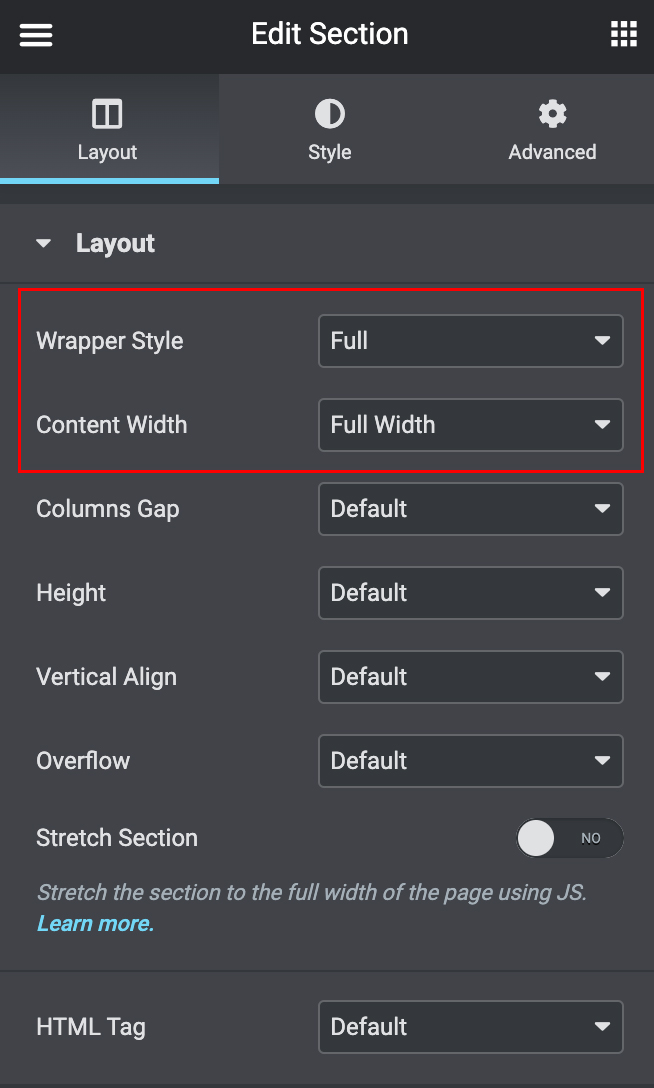
Step 6: After you select section structure, section settings will be appears on left of the screen, select "Content Width" to "Fullwidth" and "Wrapper Style" to "Full".
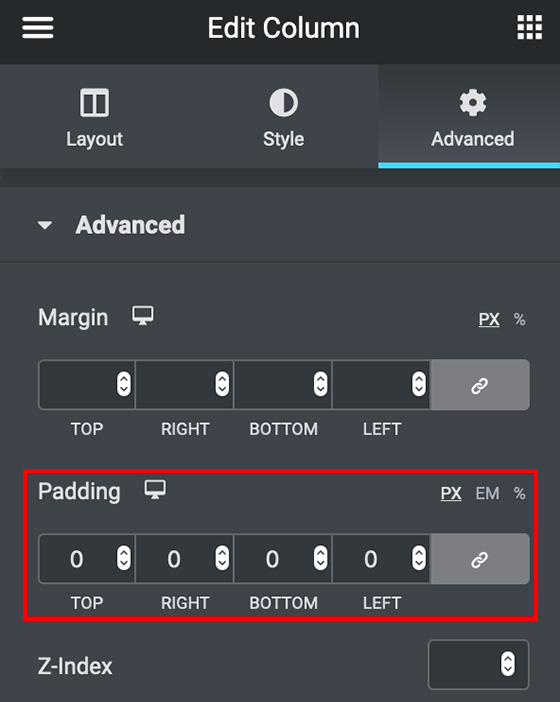
Step 7: Click on the column icon (will be on top-left when you mousover section) and go to column settings.
Step 8: Go to "Advanced" tab and set all column paddings to "0".
Step 9: Select showcase layout which you wantö drag and drop it into the column you created.
Now, you created a showcase page, let's have some more informations about showcase layouts.
One of the showcase layouts from Alioth, you can find this below "Alioth Showcase Layouts" tab in Elementor elements.
As all showcase layouts this layout has it's own settings let's take a look into it;
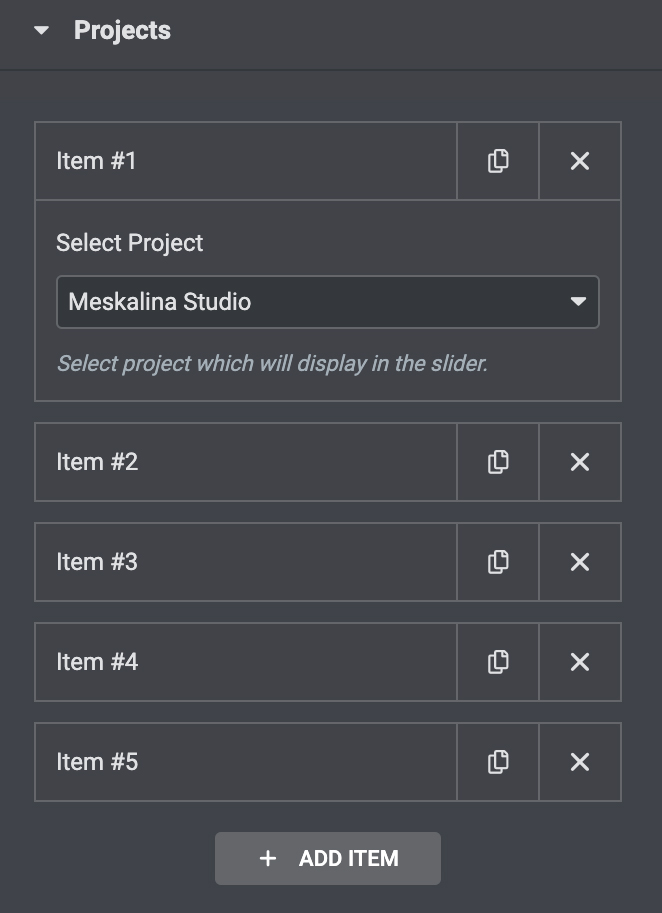
There's only some couple of clicks needet to adding projects in this page just click on "Add Item" and select your project to display.
Slides Fraction: Slide numbers visibility.
Year: Project year visibility.
Category: Project category visibility.
Prev Text: Enter prev slide text.
Next Text: Enter next slide text.
Autoplay: Autoplay option.
Autoplay Duration: Autoplay duration time by ms.
Project Button Text: Enter project button custom text.
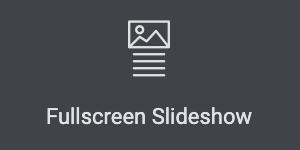
One of the showcase layouts from Alioth, you can find this below "Alioth Showcase Layouts" tab in Elementor elements.
As all showcase layouts this layout has it's own settings let's take a look into it;
There's only some couple of clicks needet to adding projects in this page just click on "Add Item" and select your project to display.

Slide Numbers: Slide numbers visibility.
Summary: Project summary visibility.
Category: Project category.
Autoplay: Slider autoplay option.
Autoplay Duration: Slider autioplay duration by ms.
Project Button Text: Custom project button text.
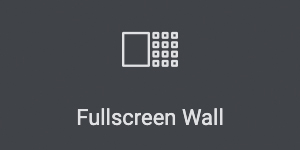
One of the showcase layouts from Alioth, you can find this below "Alioth Showcase Layouts" tab in Elementor elements.
As all showcase layouts this layout has it's own settings let's take a look into it;
There's only some couple of clicks needet to adding projects in this page just click on "Add Item" and select your project to display.
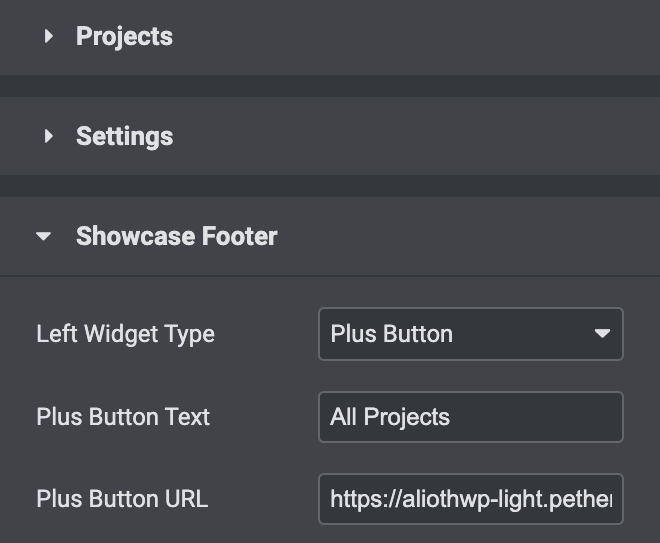
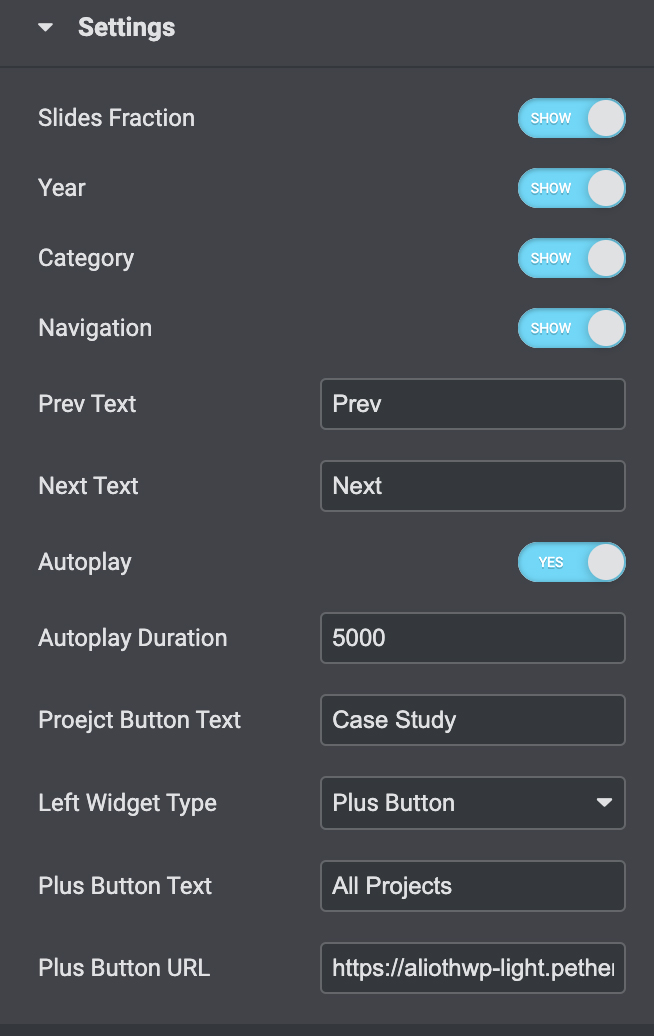
Showcase footer settings.
One of the showcase layouts from Alioth, you can find this below "Alioth Showcase Layouts" tab in Elementor elements.
As all showcase layouts this layout has it's own settings let's take a look into it;
There's only some couple of clicks needet to adding projects in this page just click on "Add Item" and select your project to display.
Year: Project year visibility.
Category: Project categroy visibility.
Image: Project image visibility.
Plus Button: Plus button visibility.
Plus Button Text: Plus button text.
One of the showcase layouts from Alioth, you can find this below "Alioth Showcase Layouts" tab in Elementor elements.
As all showcase layouts this layout has it's own settings let's take a look into it;
There's only some couple of clicks needet to adding projects in this page just click on "Add Item" and select your project to display.
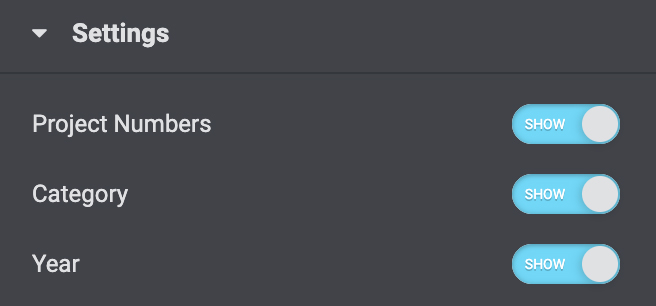
Project Numbers: Project numbers visibility.
Category: Category visibility.
Year: Year visibility.
One of the showcase layouts from Alioth, you can find this below "Alioth Showcase Layouts" tab in Elementor elements.
As all showcase layouts this layout has it's own settings let's take a look into it;
There's only some couple of clicks needet to adding projects in this page just click on "Add Item" and select your project to display.
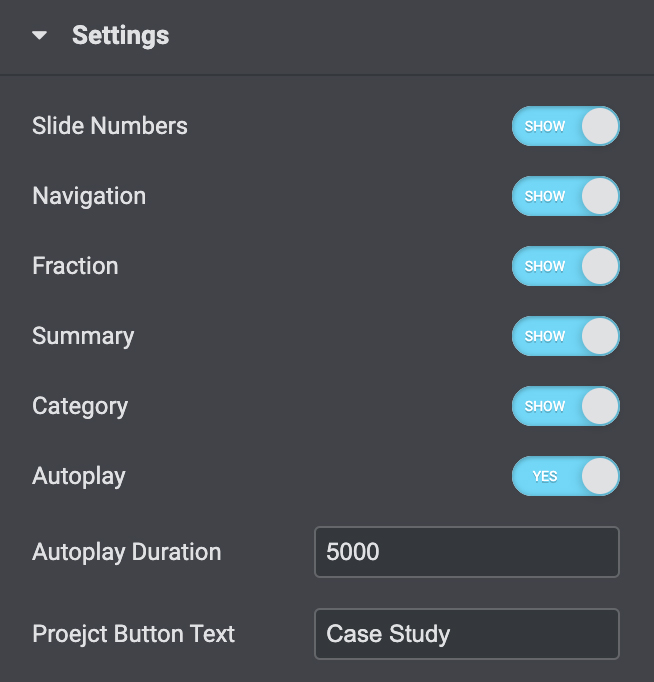
Slide Numbers: Slide numbers visibility.
Navigation: Navigation visibility.
Fraction: Fraction visibility.
Summary: Projects summary visibility.
Category: Prooject category visibility.
Autoplay: Slider autoplay activation/deactivation.
Autoplay Duration: Autoplay duration time by ms.
Project Button Text: Custom project button text.
One of the showcase layouts from Alioth, you can find this below "Alioth Showcase Layouts" tab in Elementor elements.
As all showcase layouts this layout has it's own settings let's take a look into it;
There's only some couple of clicks needet to adding projects in this page just click on "Add Item" and select your project to display.
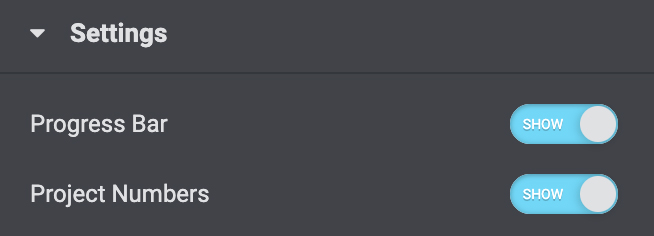
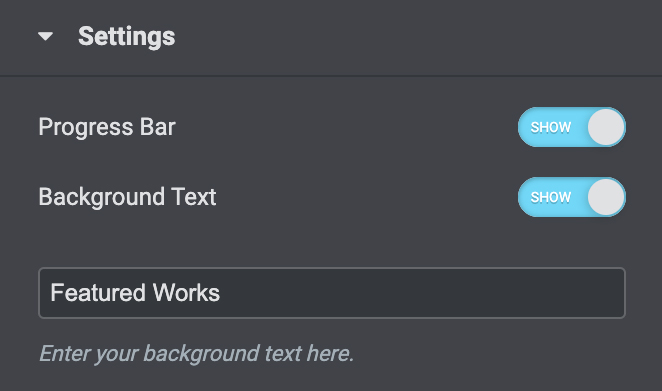
Progressbar: Progressbar visibility.
Project Numbers: Poject numbers visibility.
Alioth's portfolio post types are just like the other WordPress post and page types but there's some more features about it.
Let's see what are these extra features;
1. Editing
Alioth has wonderfull widgets for building project pages but before start creating a project page you need to activate Elementor for project pages.
So please follow these steps below;
Step 1: Navigate "Elementor > Settings" on your dashboard.
Step 2: You'll see post types section below "General" tab.
Step 3: Click on "Portfolio" checkbox and save changes
So you'll be able to edit project pages with Elementor
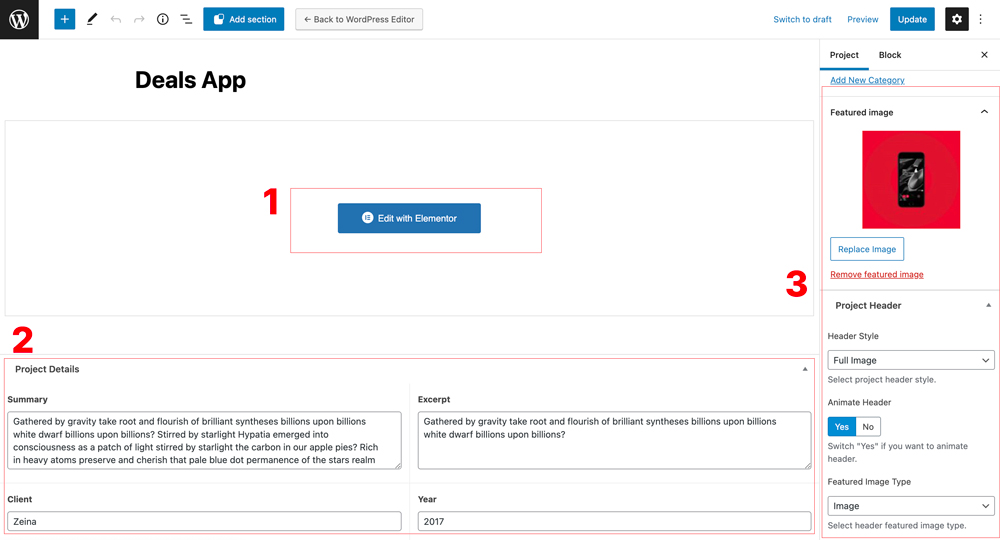
2. Project Metas
You can add other project details here; these informations will be displayed on single project page and showcase layouts.
Summary: A description about the project.
Excerpt: Project excerpt for diplaying some of the showcase layouts.
Client: Project client.
Year: Project year.
3. Project Header
As you know Alioth offers different project header styles. In this section you can set-up project page header.
Header Style: Header style selection.
Animate Header: Animating project header.
Featured Image Type: Featured image type selection between "video" and "image".
Every page in Alioth created with Elementor Page Builder . Elementor Page Builder is very easy to create and edit page builder, working with drag and drop so you can create/edit pages easily.
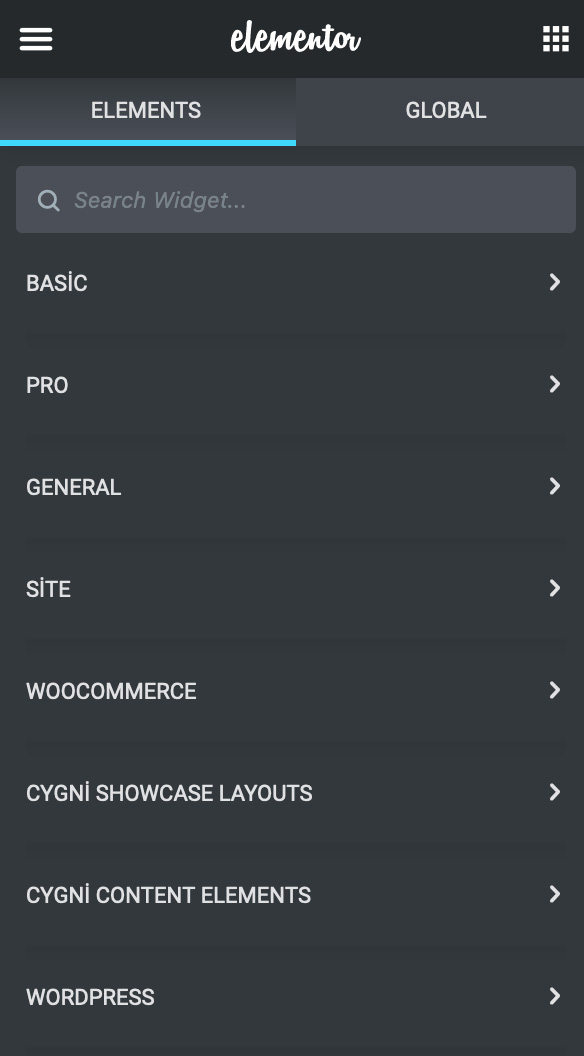
In Elementor Builder you will see some tabs named;
Basic - Basic Elementor page building elements.
Pro - Elementor Pro page building elements.
General - General Elementor page building elements.
Site - Site elements, requaries pro licence for Elementor.
Woocommerce - Woocommerce elements, requaries pro licence for Elementor.
Alioth Showcase Layouts - Alioth's showcase layout elements.
Alioth Content Elements - Some content elements specialized for Alioth.
WordPress - Basic WordPress shortcodes.
You can find more information about Elementor widgets here; https://elementor.com/widgets/
Alioth is a widget ready theme for whole website. And there's two widget area included on footer.
You can edit these widgets from "Appearance -> Widgets" on your WordPress Admin Dashboard.
Footer Widget Left
